Managing leave requests efficiently is essential to maintaining a productive workplace. With ClockitUp, rejecting a leave request is a straightforward process. Here’s how you can do it:


Step 1: Navigate to the “Requests” Section
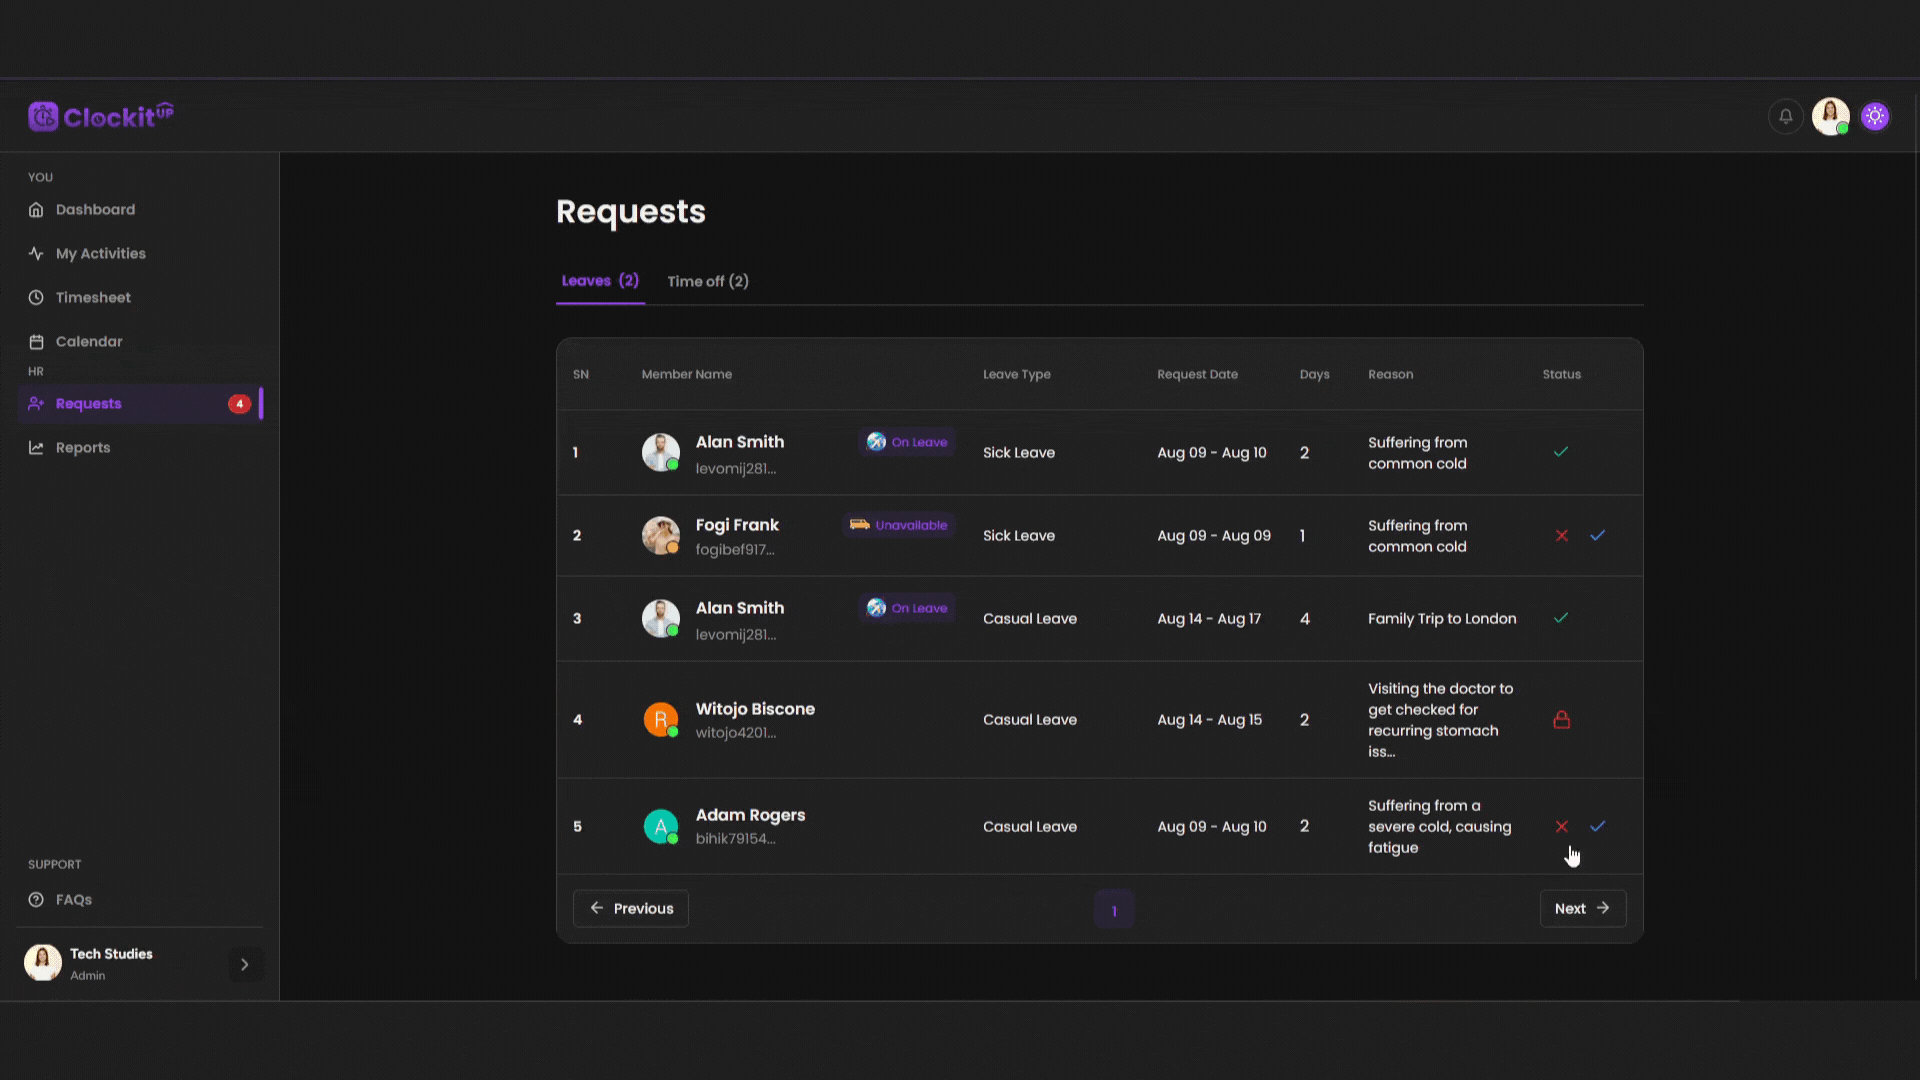
Begin by logging into your ClockitUp dashboard. On the left-hand sidebar, you’ll find various options. Click on the “Requests” option to proceed.
Step 2: View Leave Requests
After selecting “Requests,” a list of all pending leave requests will appear on your screen. Each request will display the employee’s name, the type of leave, and the requested dates.
Step 3: Select the Leave Request to Reject
Find the leave request you wish to reject from the list. Next to each request, you’ll notice a red cross (❌) icon. Click on the red cross associated with the request you want to deny.
Step 4: Confirm the Rejection
A confirmation dialogue box will pop up, asking if you’re sure you want to reject the leave request. To finalize your decision, click on the “Confirm” button. This action will officially reject the request and notify the employee accordingly.