Managing your time efficiently starts with keeping track of important events. With ClockitUp’ s user-friendly calendar feature, you can easily add and manage events to stay organized.


Step 1: Access the Calendar
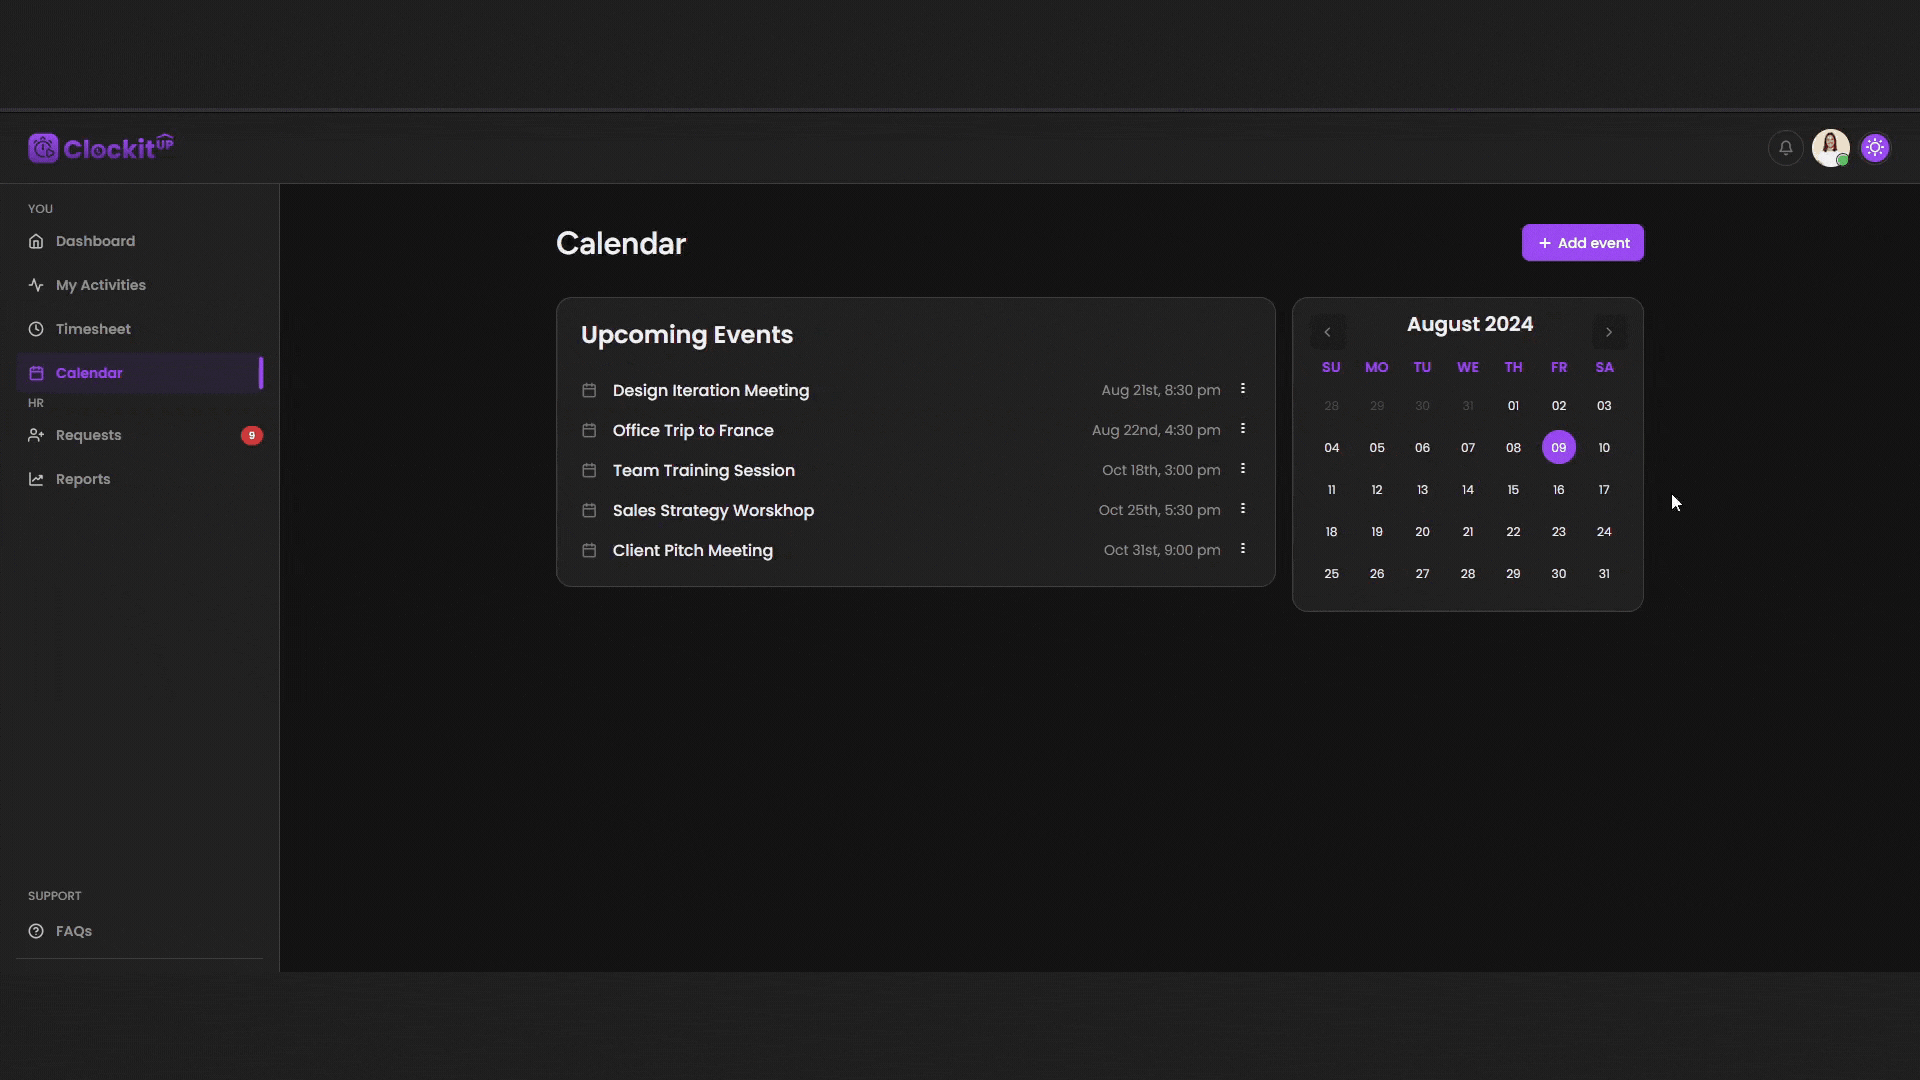
Begin by navigating to the sidebar on your ClockitUp dashboard. From the available options, click on “Calendar.” This will take you to the main calendar view, where you can see all your scheduled events.
Step 2: Add a New Event
On the right side of the page, you’ll notice an “Add event” option. Click on it to initiate the event creation process.
Step 3: Enter Event Details
A dialogue box will pop up, prompting you to enter the event title. Make sure the title is clear and descriptive. Next, specify the time for the event, ensuring it aligns with your schedule.
Step 4: Save the Event
Once you’ve entered all the necessary details, click on the “Add event” button to save it to your calendar. Your event will now be visible on the selected date and time, helping you stay on top of your commitments.